|
Ice racks are personal, like fine cars and wives. Every climber's rack is different, and putting one together can be as easy or as complicated as you like. Mine changes as the season progresses and may even change daily, depending on what and where I'm climbing. Since I'm already carrying more weight than when I'm rock climbing (excluding my holiday beer gut), I like to keep my rack as light and simple as possible. For local cragging in normal ice conditions on routes like Standard, Dracula, Gully #1 etc., I bring
8-17cm screws, 4 quickdraws, 9 free biners, 8 single-length runners, 2 cordelettes,
2-3 lockers and a belay/rappel device. This is definitely a minimalist approach,
figuring on 2 screws per anchor. If the ice is less than perfect and you need
3 screw anchors, like much of this year, you'll only have 2 screws left for the
pitch. So, if you're at your limit, bring more screws. The idea here is to be
as safe as possible, in what is basically an unsafe sport!
For big routes like at Lake Willoughby, I'll add 3-4 more screws.
Heading to the Ravine for a long Alpine route, I'll still bring 6-8 screws substituting
a few shorties for some of the 17's and adding a small selection of pins, a set
of wire nuts, a few tri-cams and a specter. I'll also make sure I have extra webbing
and a hook to make v-threads for retreats.
In thin ice conditions, I'll substitute a few short screws and
bring wires and Tri-cams and maybe a Specter (they can work ok in frozen cracks,
but don't count on them for much). If I'm familiar with the route I'm climbing
or have good beta I may add a piece or two of appropriate rock gear. For example
I will take numbers 1, 2, and 3 Camelots for a route like the Penguin in thin
conditions..
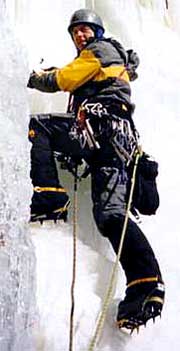 |
| Dave Kelly on Fang in a good year |
Ultimately of course it's not so much what you carry, but knowing
how to use it. Learn how to place protection properly, understand what works,
be efficient. Placing lots of crappy screws is not a substitute for good skills!
Understand the consequences of a fall. I still believe in the prime axiom of ice
climbing; "falling is not an option." Always anchor and protect
your belayer, be wary of climbing below others and above all climb safe.
Putting together an ice-rack from scratch? It's not cheap, but
here's a suggestion for a good all around rack that you could use in varying configurations
to cover most anything in the Whites. As you might notice, I'm not a fan of short
screws. You can always tie off a 17, but you can't make a 10 any longer!
Basic
2 - 22cm ice screws
8 - 17 cm ice screws
2 - 7 or 10 cm ice screws
6 - quick draws
8 - single length runners/slings
10-16 - biners
2 - cordelettes
2-3 - locking biners
Optional
1 - v-thread tool & webbing
1 - thin baby angle
1 - small angle
1 - medium angle
1 - knifeblade
1 - lost arrow
You can always include assorted rock gear from your summer rack,
depending on the route and conditions. Mixed routes may require anything from
your complete rock rack, to just a set of draws.
|


