| To Bolt Or Not To Bolt, by Dave Kelly |
|
Just mention bolts in this town and you’ll
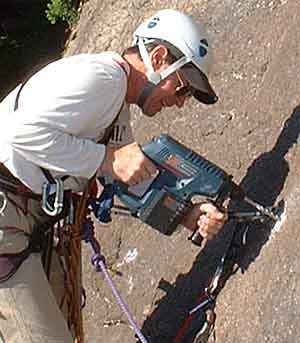
always find a lively discussion. The Theory: When planning a new route that will require bolts, give it a lot of thought before firing in those fat “shineys.” Clean the route thoroughly and top rope it several times marking where you think the bolts will go. Have several others top rope it as well. Have someone top rope it that is climbing at that level, in other words, if the climb will be rated 5.10, make sure someone climbs it who is at their limit at 5.10. They will have a better feel of where the bolts work best compared to a 5.12 climber. Try to keep the bolts in a relatively straight line if possible, on one side of the climb, that way you’ll be less likely to catch the rope on your foot when you fall. Don’t place the bolts too close to holds so that they won’t interfere with your hands or feet. Place the first bolt high enough so it does some good. Clipping a bolt 6 feet off the ground is only good for about 2 feet of climbing. Place bolts above ledges or the ground close enough to avoid ground fall or hitting the ledge, you can space them out more when that danger isn’t present. Before drilling, gently tap the rock all around where you want to place the bolt to make sure it isn’t hollow. Select a nice flat spot and chip away any crystals to make sure the hanger will lay flat when the nut pulls it in. Drill perpendicular to the rock surface. Having a partner to help you align the drill can be very helpful. Drill the hole the length of the bolt minus approximately 1/2 inch.
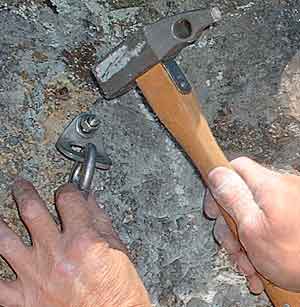
Put a piece of tape on the drill-bit to mark how deep to drill and remember, the hole must be deep enough that the bolt stud doesn’t bottom out in the hole. Be sure to blow out the dust and debris from the hole with a plastic tube. Place the hanger and nut on the bolt before you put it in the hole. Then back-out the nut so it is about 1/8 inch from the end of the stud. This way when you hammer the bolt into the hole, if you muck up the threads when you hammer in the stud you will still be able to tighten down the hanger and nut. Tap the bolt into the hole with several firm taps, making sure it is aligned straight. Continue tapping it in all the way until it bottoms out on the hanger.
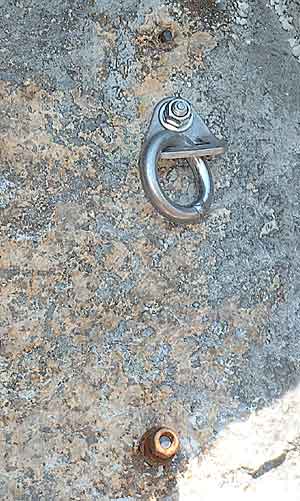
Use a crescent wrench to tighten the bolt until it pulls out of the hole a quarter to a half an inch. As you tighten, align the hanger so it ends up with the large opening down. DO NOT pound on the hanger with the hammer. You can weaken or even crack the hanger. If you need to re-align the hanger, loosen the nut first. Be sure not to over-tighten the nut. If you are using a expansion-sleeve style stud you should feel the sleeve expanding as you tighten the nut. Never using larger than a 3” adjustable wrench will help prevent over tightening.
NOTE: Use of epoxy or silicon in the holes is not recommended, as it traps moisture when the bolt contracts and expands. When placing bolts for the anchor, place them as high as possible, keeping in mind short climbers of course. This makes the stance that much more comfortable for belaying and better for rappelling . In granite the bolts should be placed side-by-side at the same height anywhere from 6-12 inches apart. If the stance will be used mainly for rappelling or top roping, use stainless ring hangers. That way the anchor won’t accumulate slings and other assorted “tat.” In traditional climbing areas do not place bolts where there are trad placements. On the other hand, if the area style is predominantly sport climbing and the route has 1 trad placement and 8 bolts, it is generally acceptable to add a bolt. Last of all, use only quality stainless steel climbing bolts at least 3/8 in diameter and 3 inches long. These are made by a number of manufacturers such as Petzl, Metolius, and a few others. This is no place to scrimp. Replacing Existing
Bolts: If you are going to replace bolts, using the same hole for the new bolt is preferable, but can be difficult. Using a crowbar to pry on the old bolt hanger is useful, but if the bolt won’t come out, cut off the old stud using a cold-chisel or hacksaw. If you don't have either you can also pound back and forth on the old bolt until it snaps off, hopefully not trashing the surrounding rock. Next, pound the stud back into the hole until the stud is recessed approximately ¼ inch. Fill the hole with a mixture of epoxy and crushed rock taken from the same vicinity. Push the epoxy into the hole and squish the mixture in with the hammer. Rubbing the epoxy with moss or mud before it cures will make help make the epoxy-filled hole match the surrounding rock. With a little effort old bolt holes will be invisible to all but the closest scrutiny. The Tools: Be sure to tie-off your tools. Nothing is more annoying than dropping your only wrench from 2 pitches up, unless it’s from 5 pitches. Clip the bolts and hangers to biners. Coda: Once you start a project, finish it. Article (c) 2002 Dave Kelly |